Step 1. Account Activation
Visit "https://www.huobi.bi/zh-cn/" and log in to your Huobi account. Click "USDT-margined Swaps" and activate USDT-margined swaps trading first.
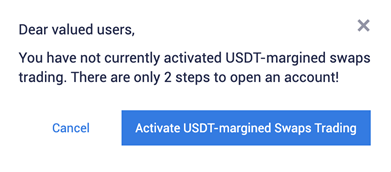
Users are required to complete ID verification first. If you have completed, click “Next” to enter into the User Agreement page. Click “Open” if you have no problem with the User Agreement. Now you’ve successfully activated USDT-margined swaps trading.
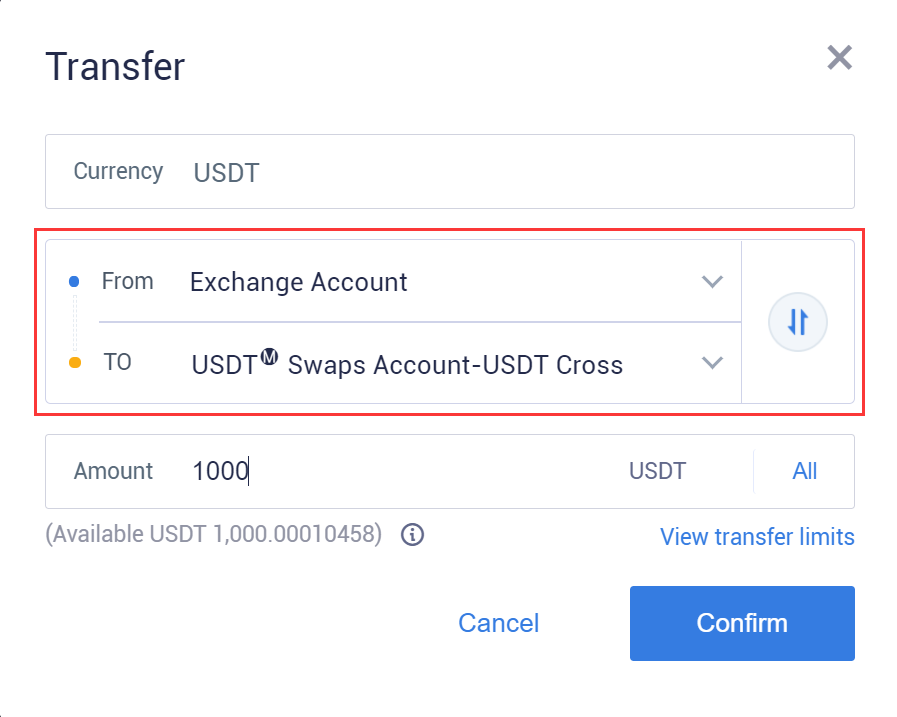
Step 2. Asset Transfer
The margin of all USDT-margined swaps are stored in USDT. Users could begin trading by transferring USDT to USDT-margined swaps account. Currently USDT-margined swaps support transfer from exchange account, and transfer between isolated margin account and cross margin account for each swaps.
- Transfer from exchange account to USDT-margined swaps isolated margin account
If you want to trade BTC/USDT swaps in isolated margin mode, you have to transfer USDT from [exchange account] to [USDT Swaps Account-BTC/USDT] first.

- Transfer from exchange account to USDT-margined swaps cross margin account
If you want to trade BTC/USDT swaps in cross margin mode, you have to transfer USDT from [exchange account] to [USDT Swaps Account- USDT Cross] first.
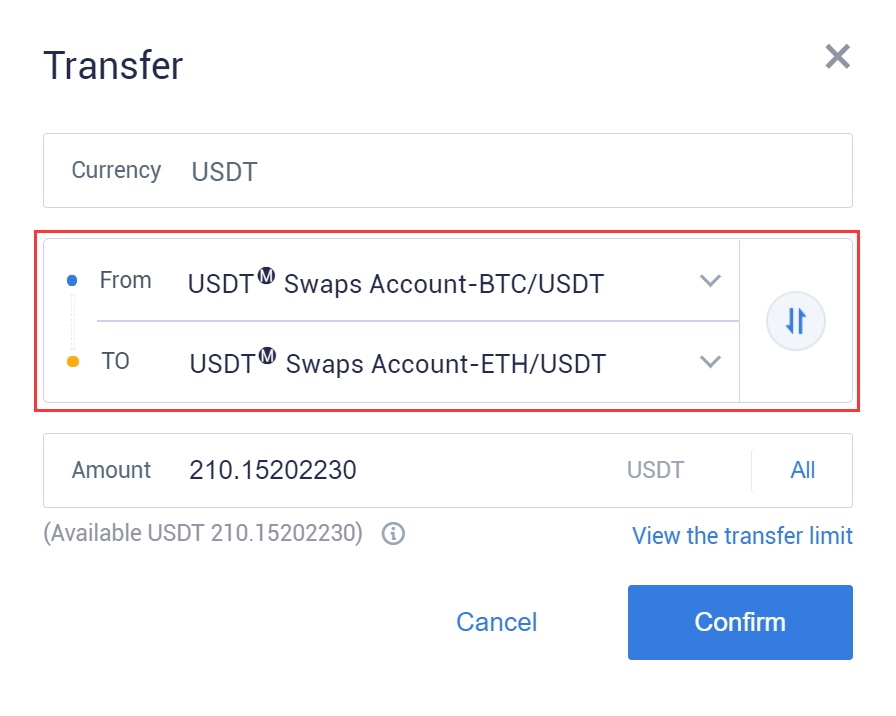
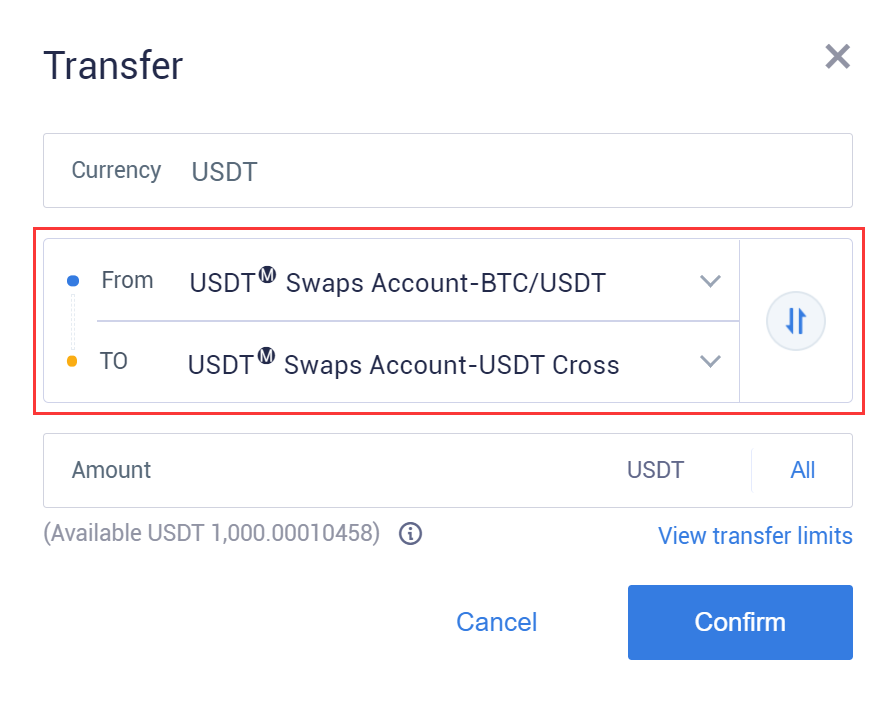
- The mutual transfer of various accounts of USDT-margined swaps:
If you have traded BTC/USDT swaps in isolated margin mode before and want to transfer the remaining assets in isolated margin account to your ETH/USDT isolated margin account. You can click to transfer the remaining assets from [USDT-margined swaps account- BTC/USDT] to [USDT-margined swaps account- ETH/USDT] as the picture below. If you need to transfer the remaining assets of BTC/USDT isolated margin account to cross margin account, you could click to transfer the assets from [USDT swaps account-BTC/USDT] to [USDT Swaps Account- USDT Cross]
Note:
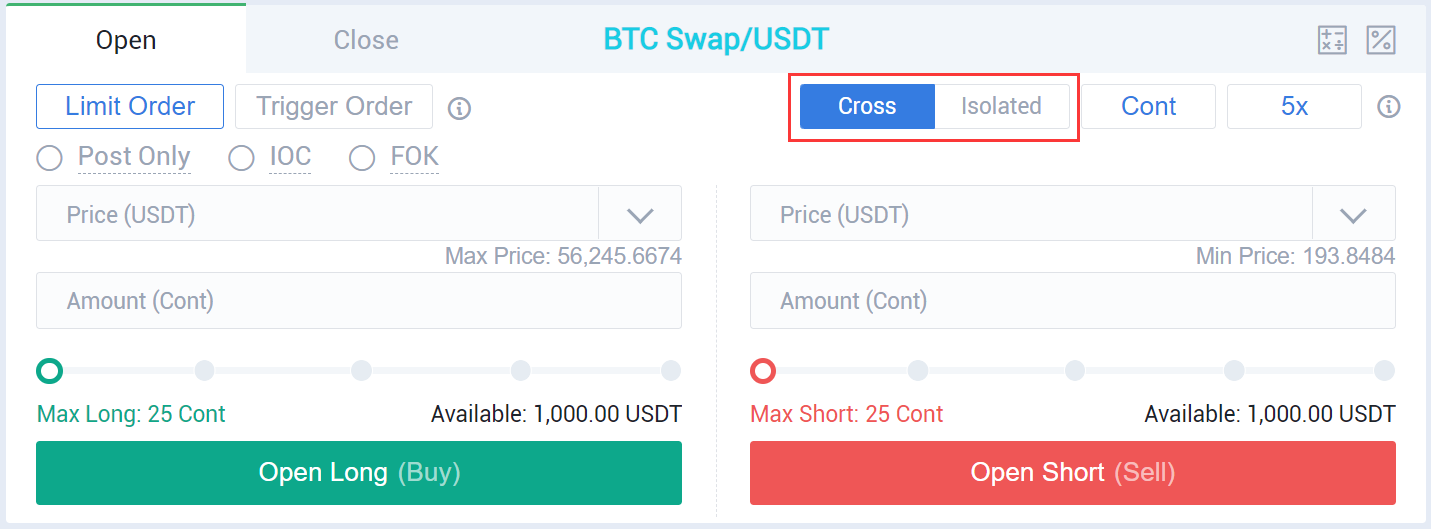
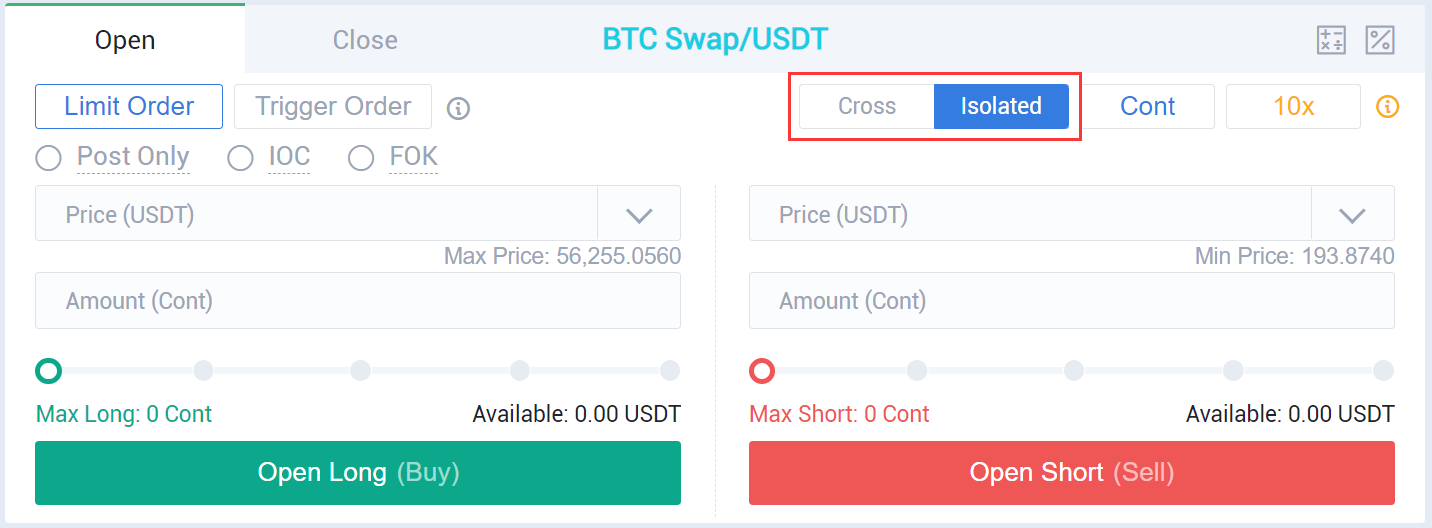
- Isolated margin mode: the account equity for each swaps is calculated separately, and the occupied margin, PnL and margin ratio of each swaps will not affect each other.
- Cross margin mode: all swaps under the cross margin mode share the USDT in the cross margin account as the margin, which indicates that all positions under the cross margin mode share the same account equity, and their PnL, occupied margin and margin ratio are calculated jointly.
Step 3. Under the cross margin mode, all USDT-margined swaps that support cross margin mode share the USDT in the cross margin account. Cross and isolated margin mode can be used at the same time, and switch to another mode will not affect the current positions.
Step 4. Open a Position
After transferring assets to your account and selecting a margin mode, you could begin trading. At this time, you will have to choose an order type, and to be a Maker or a Taker. There are several order types we could use to open a position.
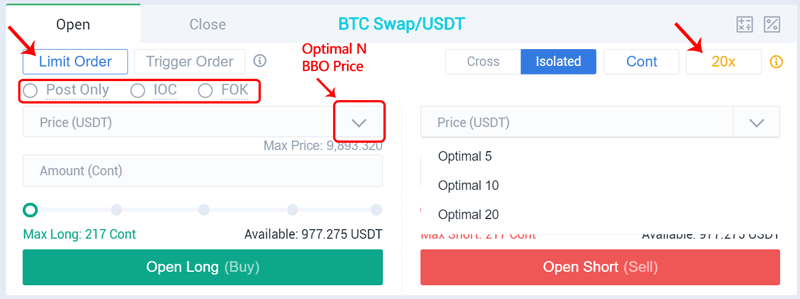
- Limit order
Click “Limit Order” and enter the price and quantity to place an order. If you choose “BBO” or “Optimal 5”, you will only need to enter the quantity.
A limit order specifies the highest price that users are willing to buy or the lowest price that they are willing to sell. After you set a limit price, the system will prioritize a price that is favorable to the user to complete the transaction. Limit Order can be used both in opening and closing positions.
There are three effective mechanisms you could choose to place a limit order: "Post only", "FOK (Fill or Kill)", "IOC (Immediate or Cancel)". If you want to know more about these mechanisms, click here for video tutorials.
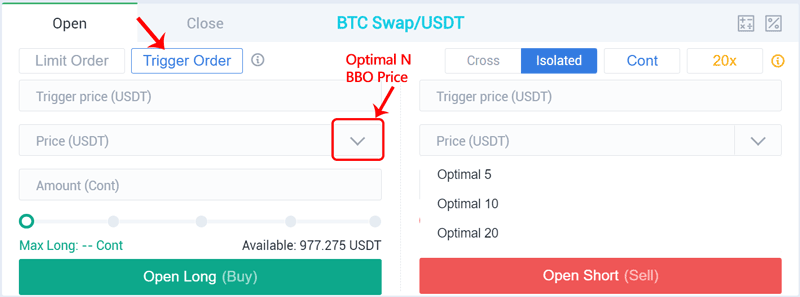
- Trigger order
To place a trigger order, a trigger price, order price and quantity are required to enter. When the latest price reaches the trigger price, the system will place an order by using the order price and quantity you previously set. For more details about trigger order, click here for Trigger Order Trading Guide.
- Follow a Maker & Taker
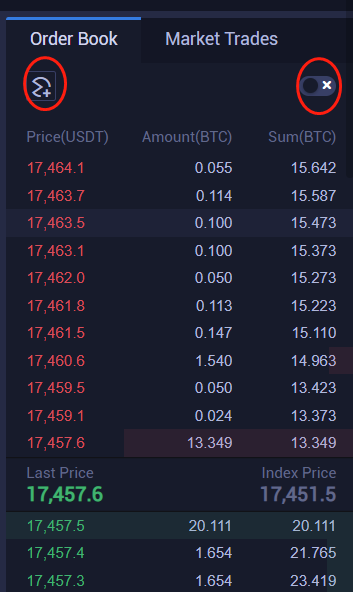
This is a unique function on Huobi, with which users could place an order more convenient. Click the button to enable the function, then you could place a limit order (buy or sell) by using the price that you selected from the order book, and the quantity you set (available assets proportion, Order Book, or Fixed Quantity) in advance.

After your order is successfully placed, the filled part will be shown on “Positions” and the unfilled part will be shown on “Open Orders”. It’s possible for you to cancel the order before it is filled.

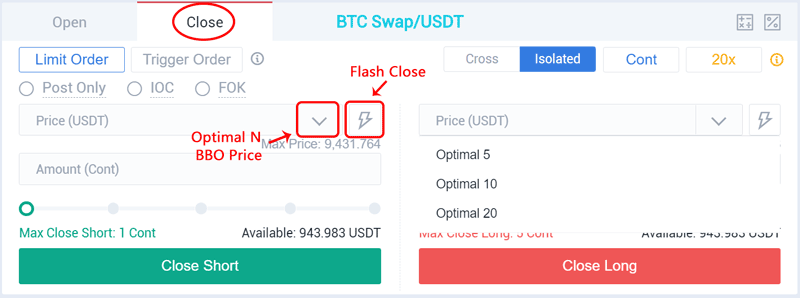
Step 5: Close a position
To close a position, you could also use “Limit Order” and “Trigger Order”. If you click “Flash Close”, the order you placed will be filled at the BBO price within Optimal 30. In this way, users will never worry for the fund loss due to inability to fill the order in a violent market.
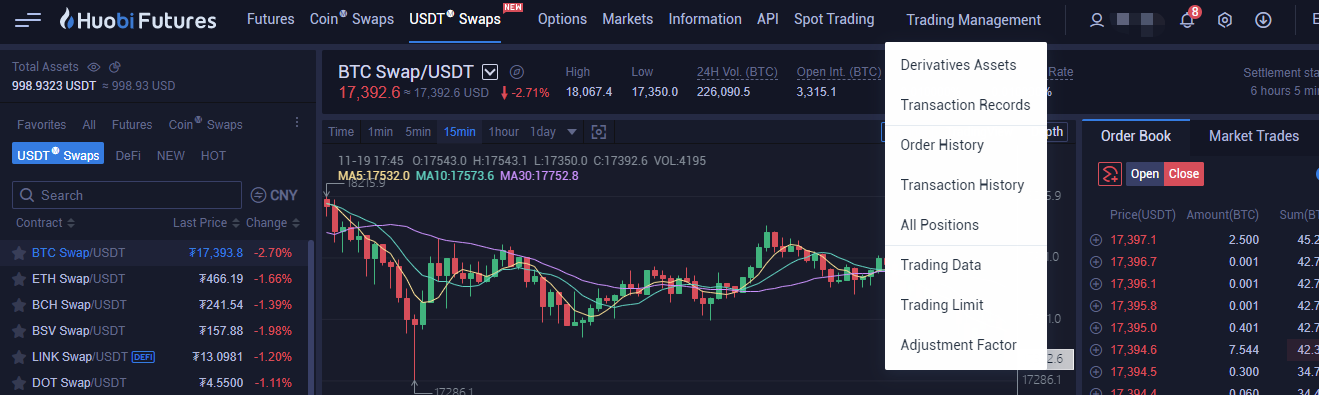
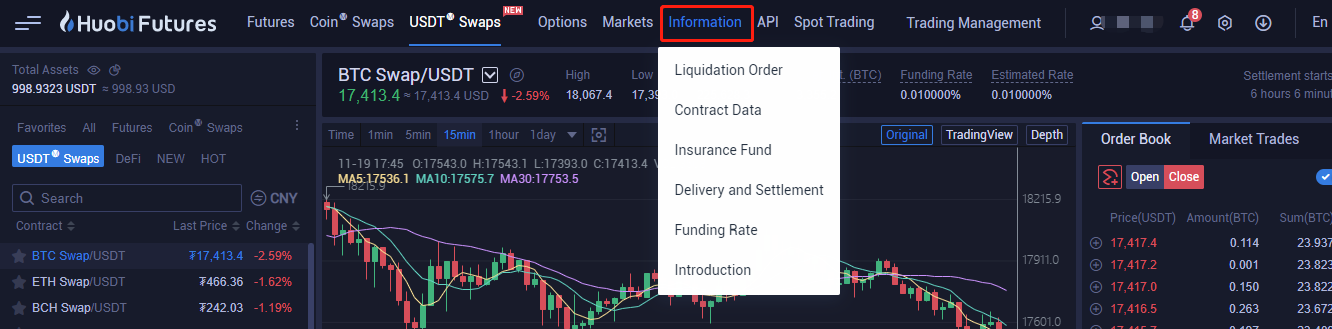
Step 6: Data Query
To get more data regarding "Settlement", "Insurance Fund" and "Funding ratio", you can click the "Information" on the top navigation bar.
You could also click the "Trading Management" on the top navigation bar to view "Order History" and "Transaction History" in the last three months.